
So, Niki has a birthday coming up and I've been trying to come up with something to do for her. I decided a purse would be a good way to go, she's living in diaper bag land, and I know she will appreciate something pretty just for her...so need, meets idea, meets salvaged fabric that I already know she likes (because she chose it!) and TADA!
 |
| See the little hand? Gigi liked it too! |

Materials:
3/4 yard of outer fabric (try to use something slightly heavier than cotton)
3/4 yard of coordinating inner fabric for the lining
thread
a button (or snap or other kind of preferred fastener)
This project has a lot of steps, but hang in there, I promise you can do it! To keep it from being too overwhelming, I've broken it down into 4 parts. The purse body, the purse top edge, the lining and pockets, and the strap and closure tab.
Part 1: The Purse Body

Fold your fabric in half, right sides facing. Pin the pattern to the fabric and cut it out. You should have two pieces exactly the same.

Now for the pleats. Find the middle of each fabric piece and create a 3" fold as pictured above.

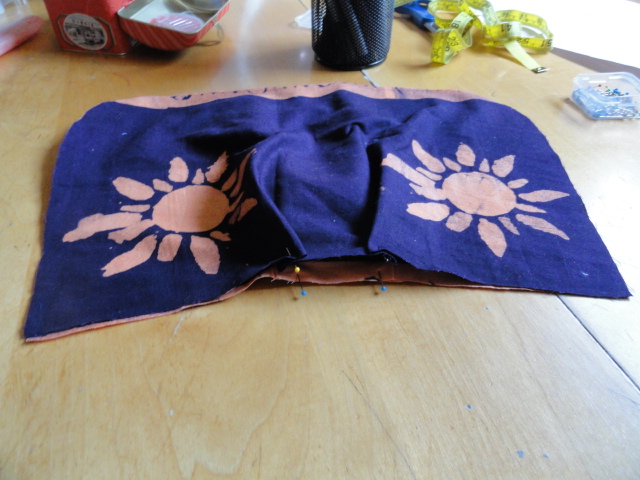
It should measure about 13" across the top after you have pinned your pleats.


Now sew the pleats in place using a 1/4" seam allowance so they don't shift later.

Part 2: Purse Top Edge


Sew around the edge of your opening using a 1/2" seam allowance and consider Part 2 complete!
Part 3: The Lining and Pockets


Think about what kinds of things you want specific pockets for...in this case, Niki has a smart phone that is slightly larger than the I phone, and I figured she should have a pen pocket (because I don't know anyone who hasn't had to go purse diving for a pen, or worse, had a pen explode in the bottom of the bag!!!)


My first pocket measured 10" x 5 3/4" and my second pocket measured 7" 8 1/2". I again used paper to make the pocket pattern. Cut two of each pocket piece...this is getting a bit tongue twisty, Peter Piper anyone?...

Clip the corners and turn your pockets right side out. Press your pockets and place them on the desired lining piece.

Making sure that the opening that you left is on the bottom, sew each pocket in place using a 1/4" seam allowance. Now, once the pockets are sewn on you can customize them. An I phone needs a pocket that is about 3 3/4" wide, since Niki's phone is slightly larger, I made it 4 1/4".

Once you have marked how large you want the pocket to be, just sew a straight line from the top of the pocket to the bottom. And good bye Part 3!
Part 4: Strap and Closure Piece
For the strap, cut two long strips of fabric, 3" by 30" (or however long you wish your strap to be)

Lay the strips, one one top of the other, right sides facing, and sew a straight line along each long side leaving the short ends open.

It's a little bit of a pain to turn the strap right side out, but a chop stick or knitting needle can help you. Once it has been turned, press it flat and top stitch the long edges using a 1/2" seam allowance.

Set the strap aside and lets make the closure piece! Simply cut a 3" by 14" piece of fabric.
Fold the piece in half with, you guessed it, right sides facing. Sew all the way around leaving one of the short edges open for turning.

Once you have turned your piece right side out, top stitch all the way around .

Ok, now you have all the players and you are ready to put it all together!

Turn your purse body right side out, and press the top edge down 1/2". Leave your lining wrong side out and press the top edge down 1/2".

Now push the lining into the purse body. The folded edges should be facing each other.

Lay the bag flat so you know where to insert the strap ends. Pin them in place.

Now decide which side will be the back of the purse and which will be the front. Insert the closure piece into the middle of the back side. Sandwiching the piece between the lining and the outer purse body.
Sew all the way around the opening of the purse using a 1/4" seam allowance.

To make sure the straps are extra strong, sew an x inside a box for each side.

It's Button time! Each machine is different, but you will need the button hole presser foot. Look in your owner's manual for machine specific instructions.

Once the button hole has been sewn, slide a pin into the end. This is to prevent you from cutting too far when you use the seam ripper to open the button hole.

The final step is to sew on your button!

Remember, if the button installation process is too intimidating, snaps or Velcro will also work!

And you did it!

You made your own purse and it is SEW UNIQUE...

a designer original without the price tag!
No comments:
Post a Comment